Electrophoresis is a molecular biology technique where controlled electric current is used to separate biomolecules according to their size-to-electric charge ratio, using a gelatinous matrix (gel) as a base.
One of the common uses of this technique is in the realization is the so-called DNA electrophoresis that can be carried out in agarose or polyacrylamide gels. Both have different characteristics in terms of their properties and method of preparation, so one or the other will be used depending on the application and objectives to be pursued. Agarose gel electrophoresis is the standard method for separating and purifying DNA fragments when high resolving power is not required. For its part, electrophoresis in polyacrylamide gels, although it has a greater limitation in terms of the size of the fragments that we can separate (5-600 bp), has a much higher resolution power, allowing the separation of molecules that differ in a only base pair. Polyacrylamide gels run vertically and have the disadvantage of being more complicated to make and handle.
In this article we will focus on the steps to perform a DNA electrophoresis run on agarose gels:
Preparation of the agarose gel
- Weigh the amount of agarose necessary to obtain the desired concentration based on the gel volume.
- Add the agarose to the buffer (TAE 1x or TBE 0.5x) in a flask.
- Heat the mixture in a microwave oven until all the agarose is observed to have melted.
- Let the agarose solution cool down to a temperature of about 50 ° C.
- While the agarose solution is cooling, prepare the mold in which the gel will be made by sealing the edges with masking tape, or by placing it in the device provided for it, and placing the comb in the desired position.
- Carefully pour the agarose solution onto the level mold and allow it to solidify for at least 30 min.
Sample preparation
- Mix both DNA samples and size marker with 0.2 volumes of 6x loading buffer. The total volume will be determined by the size of the wells, usually 15-30 µl.
Loading the samples and running the gel
- Once the gel has solidified, remove the seal from the edges and place the mold with the gel in the electrophoresis chamber.
- Add electrophoresis buffer (TAE 1x or TBE 0.5x) until the gel covers about 3-5 mm.
- Carefully remove the comb to free the sample wells.
- Load into the wells the samples that were prepared in step 7.
- Connect the cables to the power supply and apply a voltage of 20-150 V (1-5 V / cm according to the distance between the electrodes). The voltage setting is highly variable depending on the chamber and the sizes to be separated, not very high voltages are recommended for very large DNA sizes.
- Run the gel until the bromophenol blue dye is at an edge distance of approximately 25% of the total length of the gel. At that time the electrophoresis should be stopped.
Gel staining and DNA visualization
- If Ethidium Bromide was not added to the gel, the gel should be stained after electrophoresis is complete. To do this, the gel is removed from its mold and immersed in an ethidium bromide solution (0.5 µg / ml) for at least 15 min.
- Place the gel on a transilluminator and turn on the ultraviolet light lamp (λ ≈ 300 nm), the DNA will be visualized as orange colored bands.
- Photograph the gel with the available photographic system.
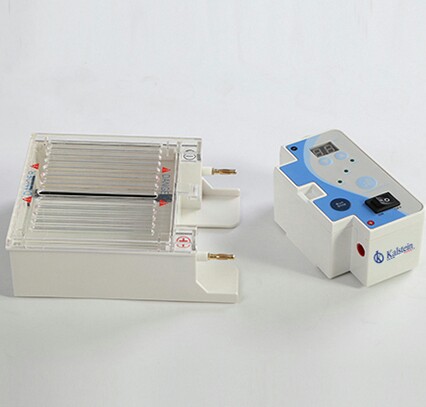
At Kalstein we are MANUFACTURERS, so you can BUY excellent electrophoresis systems for your laboratory at the best PRICES. That is why we invite you to take a look at our equipment available at the HERE